PROJECT OUTCOME PREVIEW.
BRIEF.
In this project, we are aiming to create a re-mix volume that contains everyone’s work in our team. The re-mix volume can be anything, such as a poster, a video or even an interactive space.
MEETING 01 & BRAINSTORMING.
The first thing we did after receiving our brief is to arrange a group meeting. We barely know each other before this project, and we thought a meeting helps us to know each other well and we can also use it to make a plan for the project.

All five of us gathered around and started brainstorming, around three topics: The theme, the volume and job roles.
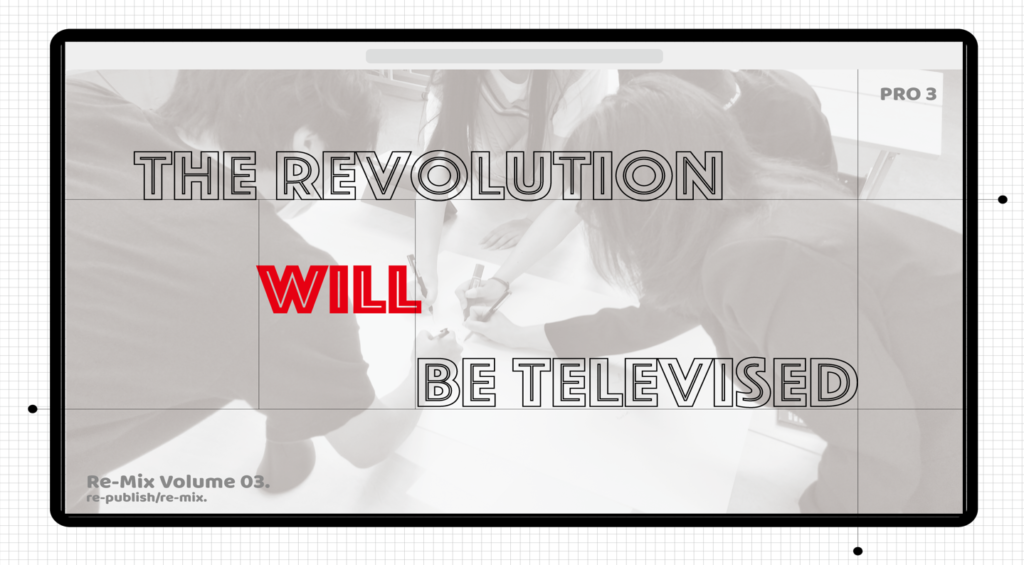
After discussion, we decided to use ‘The revolution will be televised as the theme because after presenting our work through this project, we hope the revolution will be televised.
It didn’t take too long to decide the form of our re-mix volume: we are making an interactive digital exhibition (game).
There are three reasons for this decision: Firstly, most of our work are video-related, therefore a physical or still poster cannot be used as a volume; Secondly, we know that most of the other teams are making videos, posters or booklets, but we want to make something different; Thirdly, I had experience making video games, therefore, it is our advantage to create an interactive space.
Here is an image of the brainstorm:
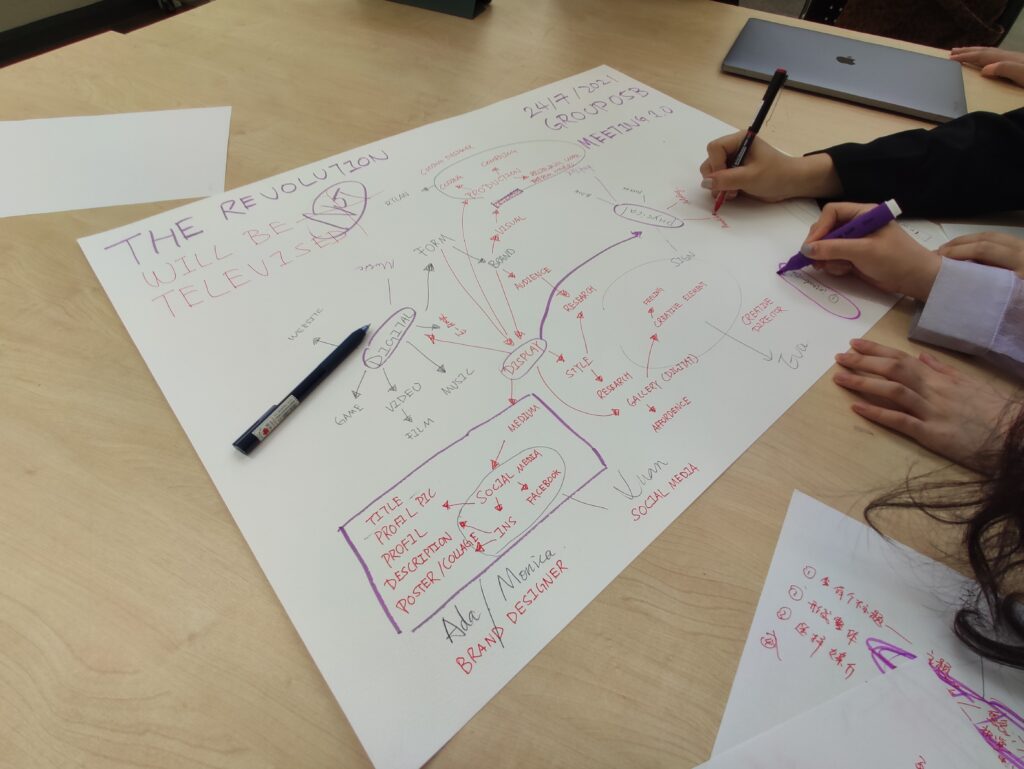
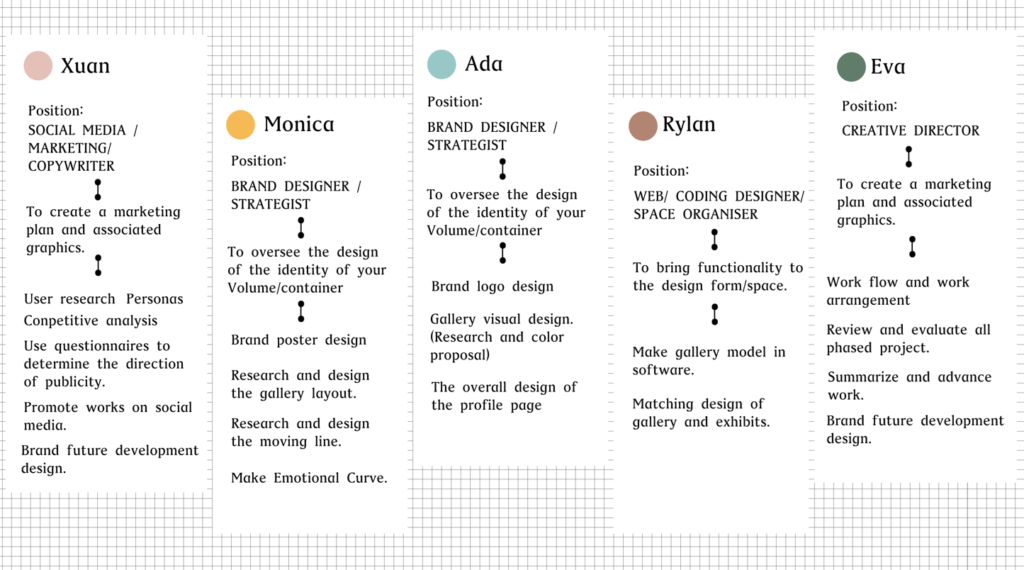
We also decided our job roles for each member, see below:
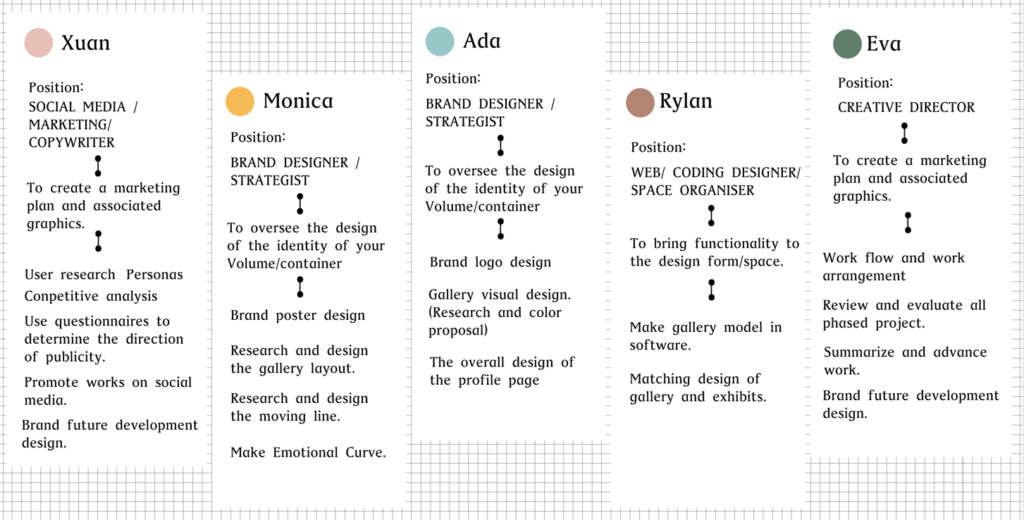
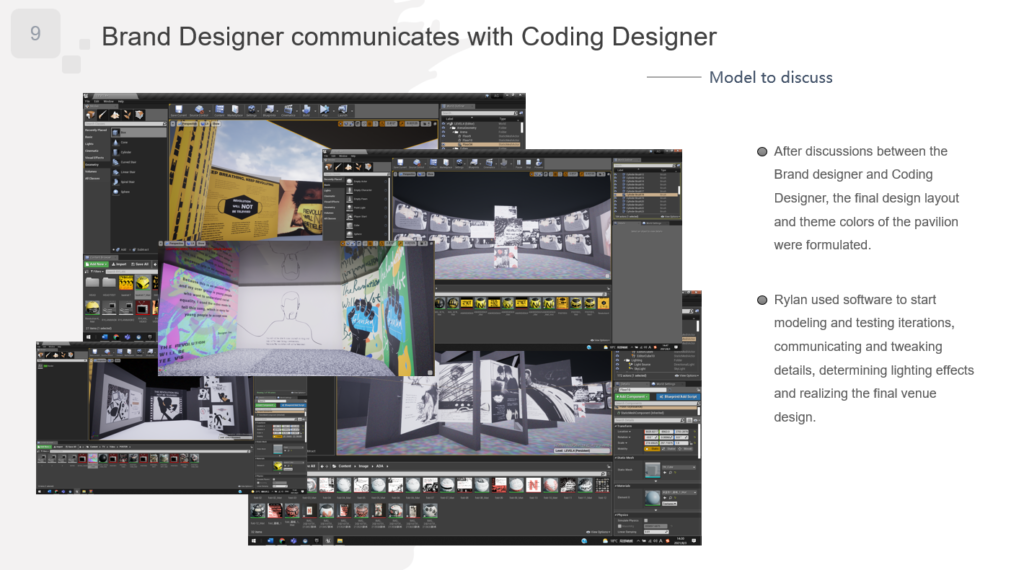
This time, I decided not to take any responsibility for the ‘design’ aspect because there are other people doing this job in our team. Instead, I am focusing on receiving work from others and compiling them into a high-quality product.
Although I am not designing anything specifically, it is still my job to work out the gameplay mechanic since I am the code designer, therefore, I made a timetable to schedule what to do every day until the crit, see below:
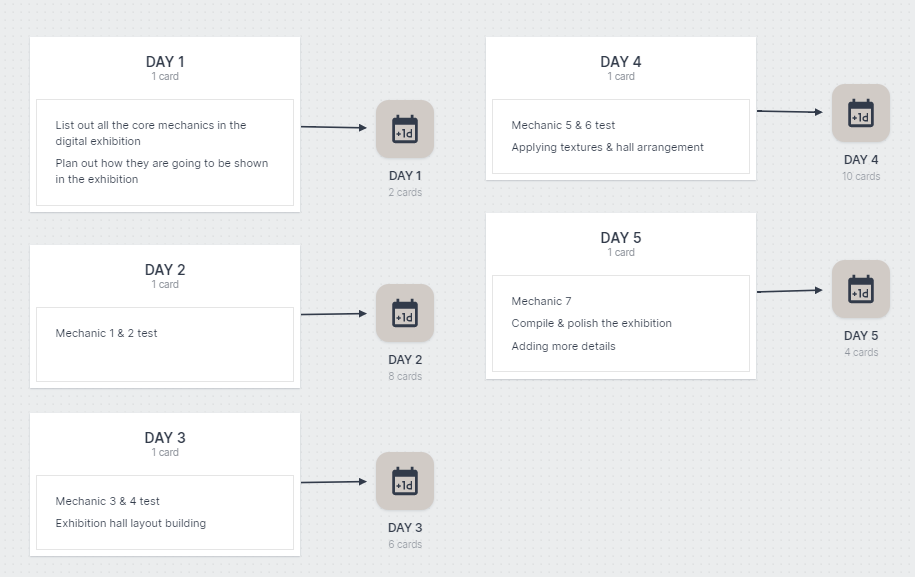
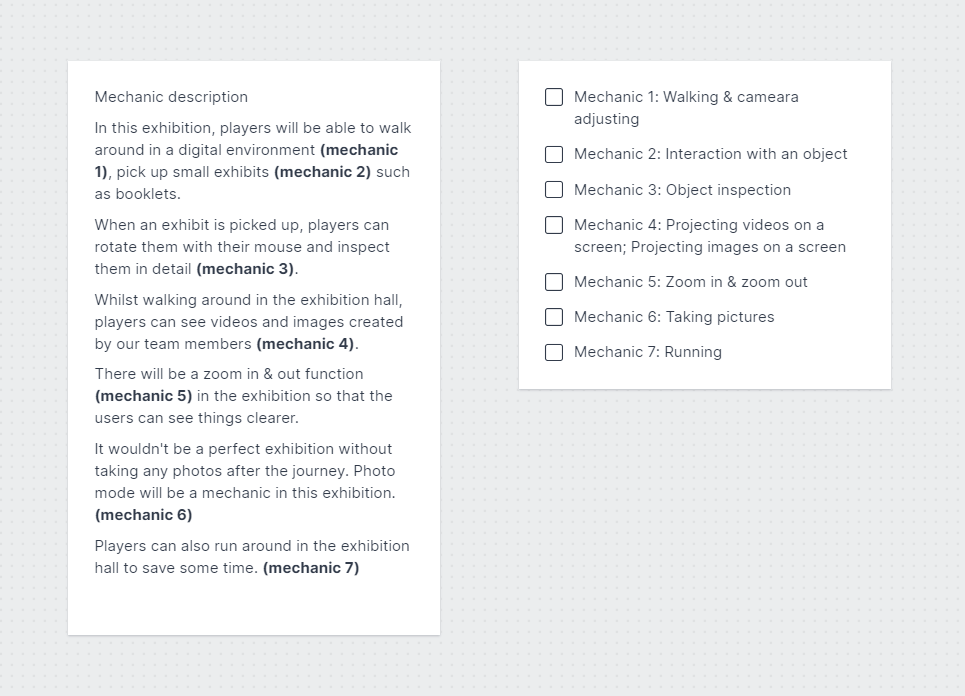
DAY 1: DESIGNING THE MECHANICS
Day 1 aims to list down all the mechanics that might be used in the exhibition, such as walking, interacting or inspecting. I had a chat with my teammates and made a short description of what players will be doing in the exhibition, and then link it with the mechanics. Overall, there are 7 mechanics in total and I will be testing them throughout the week.
I have also looked into some digital exhibitions:
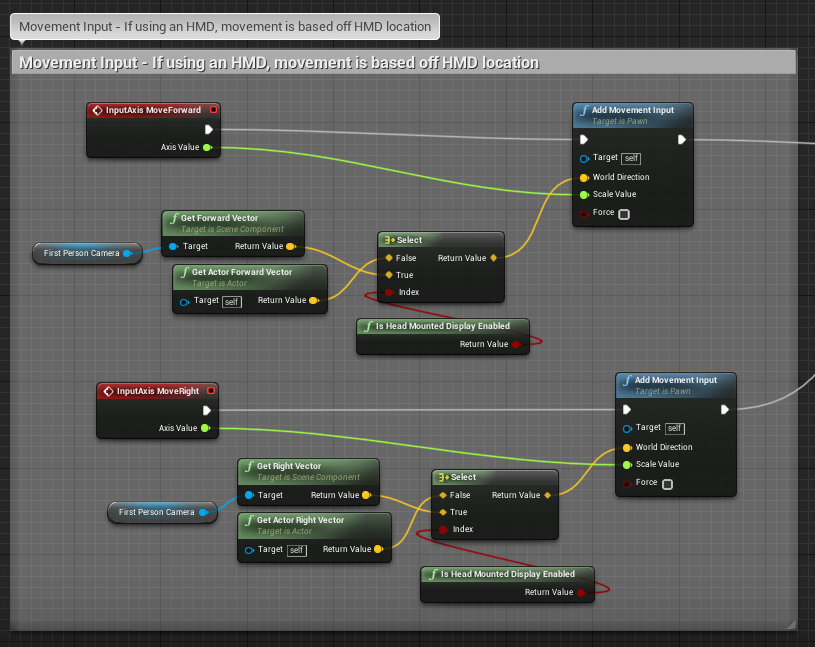
DAY 2: WALKING & INTERACTING
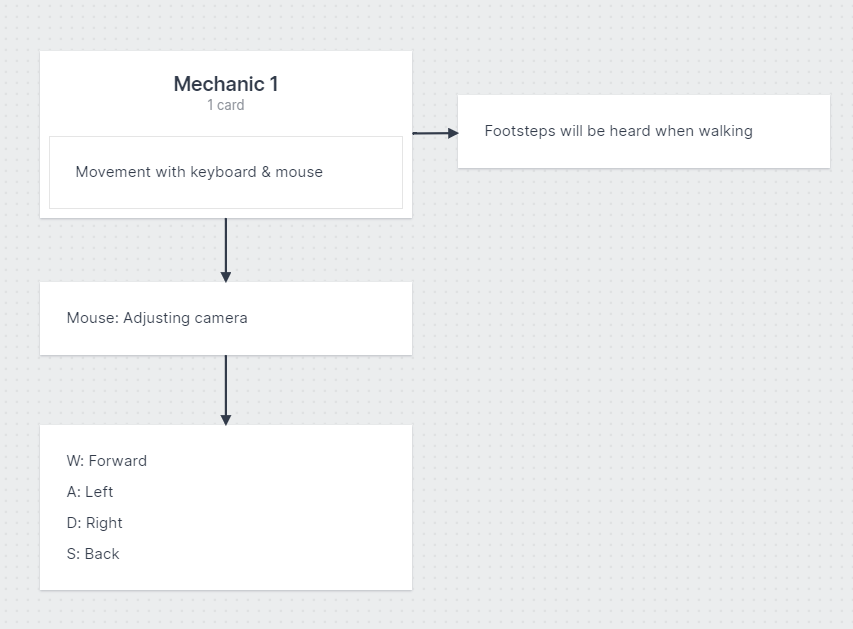
The movement mechanic is the easiest thing to do because it is a default function in UE4, see blueprint below:
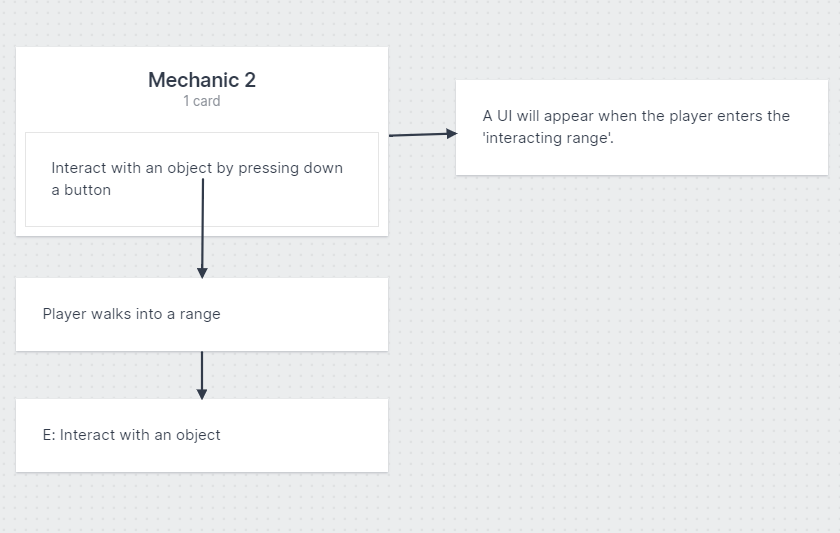
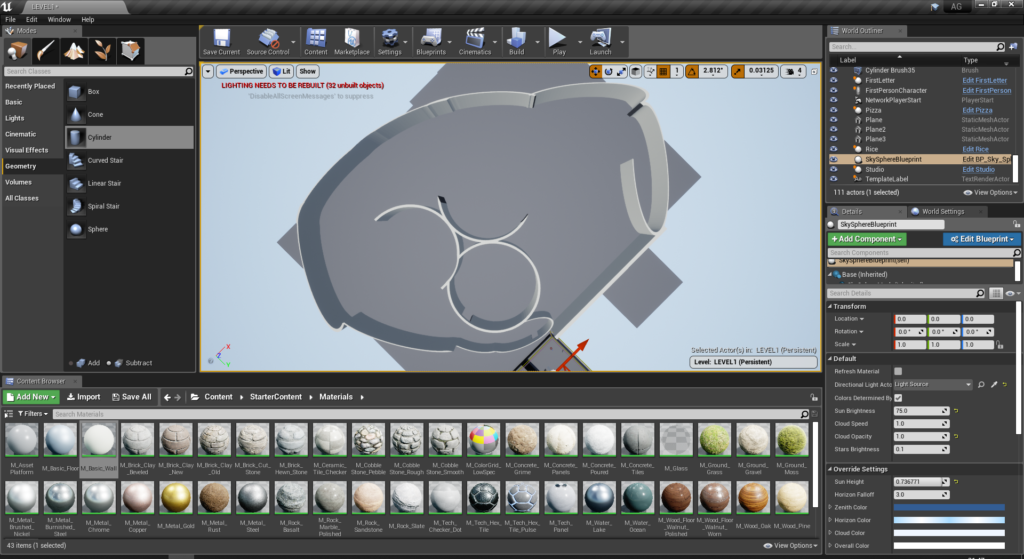
The second mechanic allows the players to know when they are able to interact with the object. The idea is to display an icon on top of the object to let them know they are in the range.
The image below is the test piece I did, notice that there is an ‘E’ showing above the pizza, meaning ‘press E to interact.

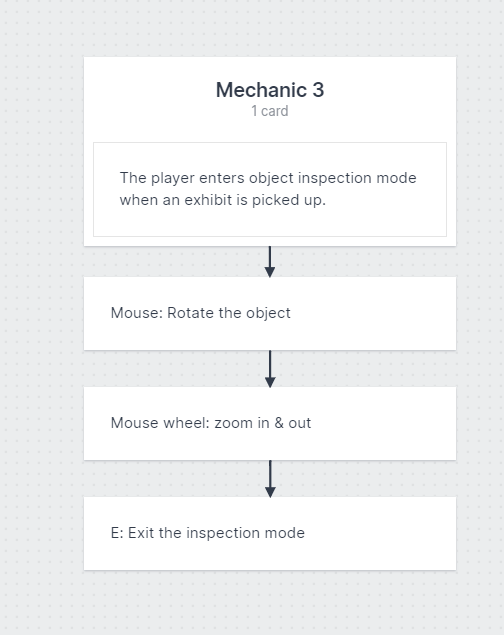
DAY 3: OBJECT INSPECTION & PROJECTION
The third mechanic is object inspection. The purpose of this mode is to let the players inspect an item in detail just like how they are holding an exhibit in their hands.
Here is a tutorial of how to do this:
Video below is the test piece I did:
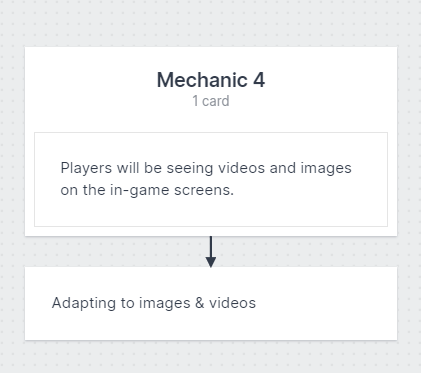
Mechanic 4 is very simple as long as the set-up has been done correctly. The logic behind this mechanic is basically assigning an image or a video to a texture, see below:
Image:
Video:
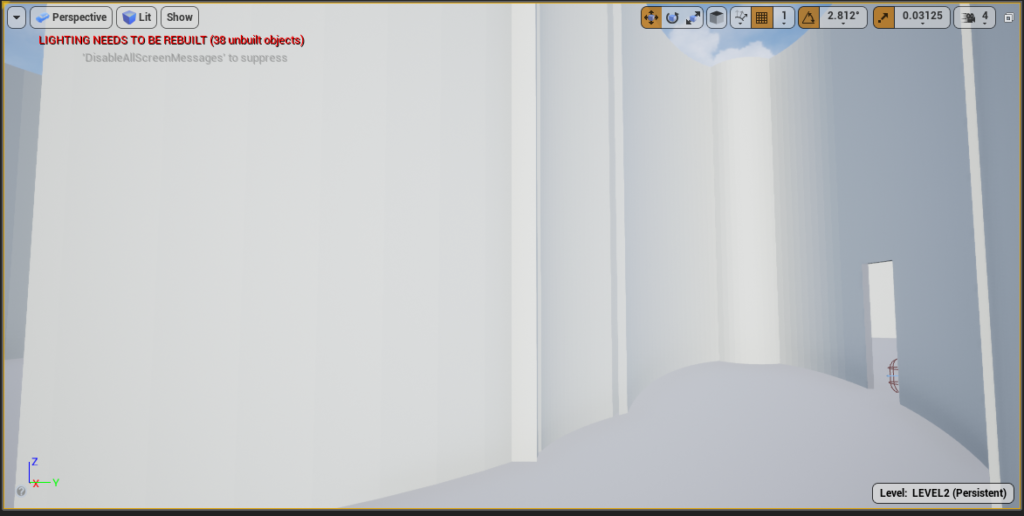
LAYOUT.
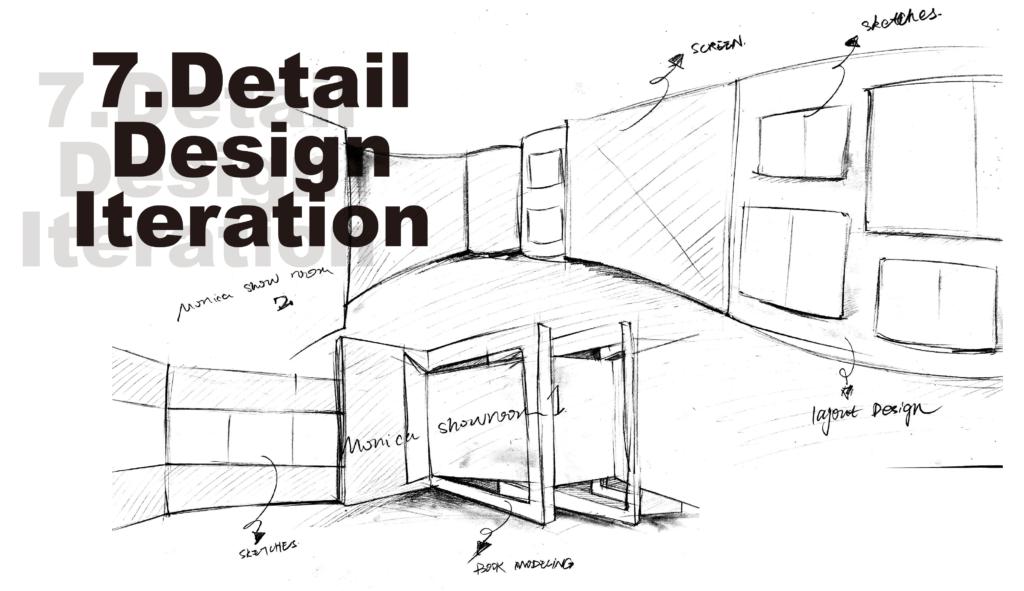
Another thing I had to do on day 3 was the layout of the exhibition hall. Monica is in charge of the layout design, visit her website to view more processes:
This is the layout she sent to me:
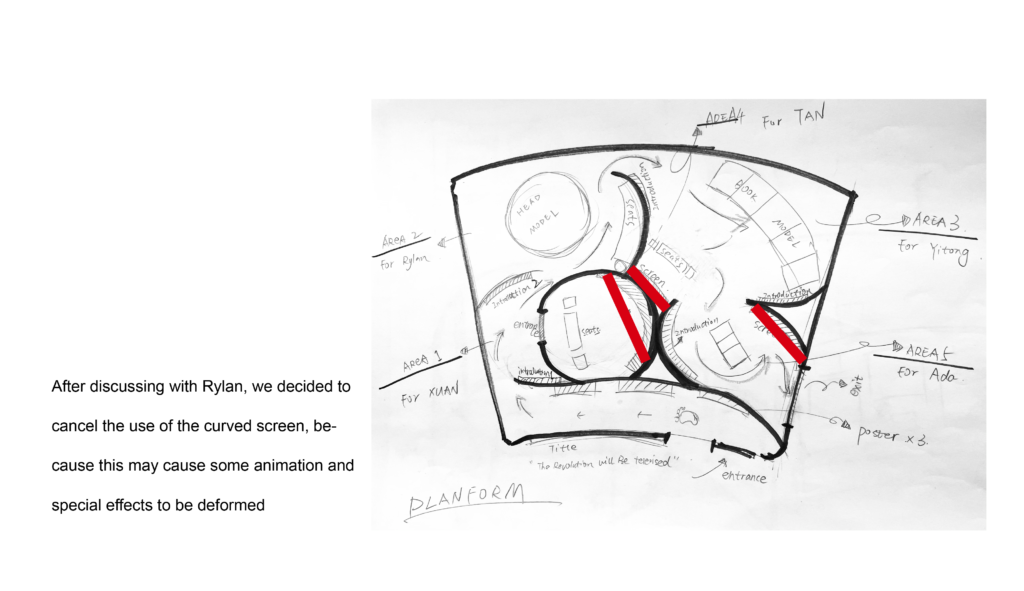
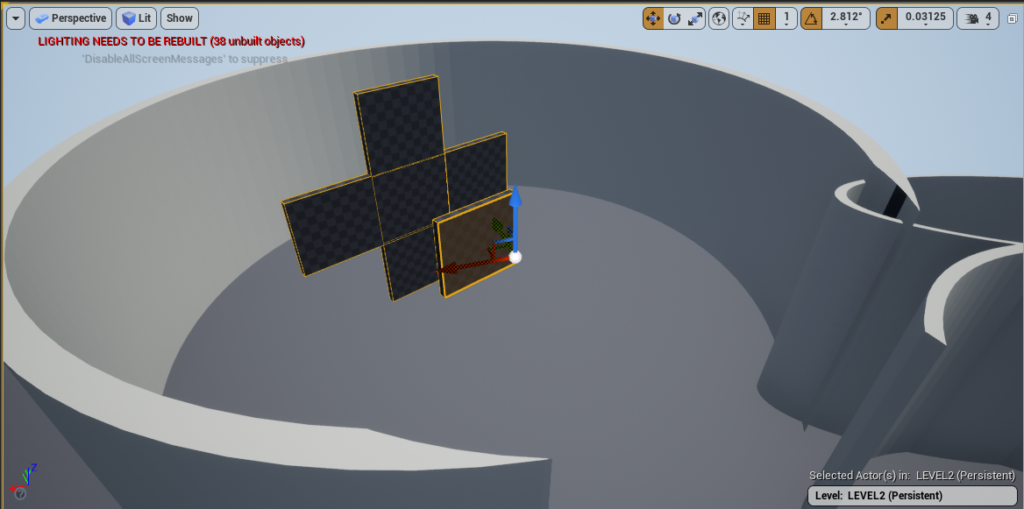
We planned to project video and images on curved screens, however, I encountered certain issues when testing it, therefore, the screens will be flat.
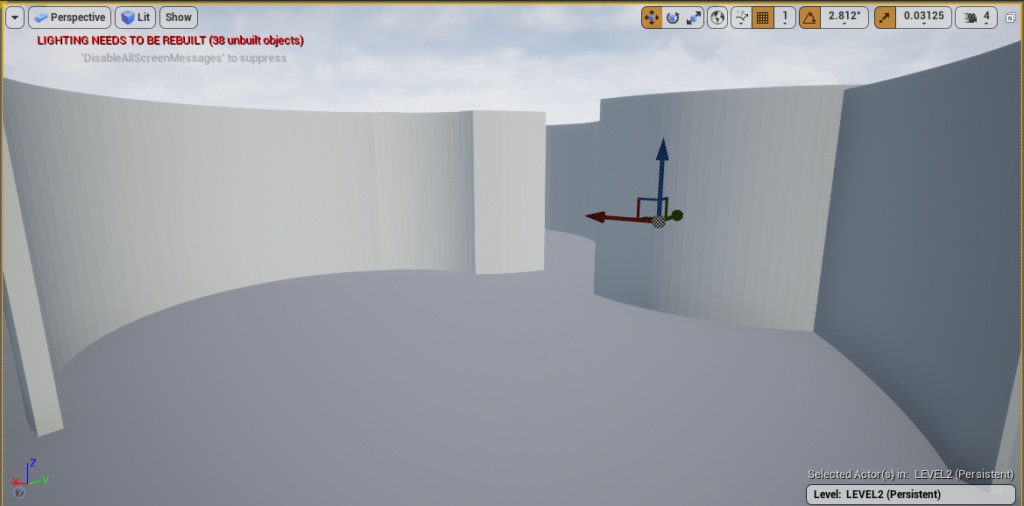
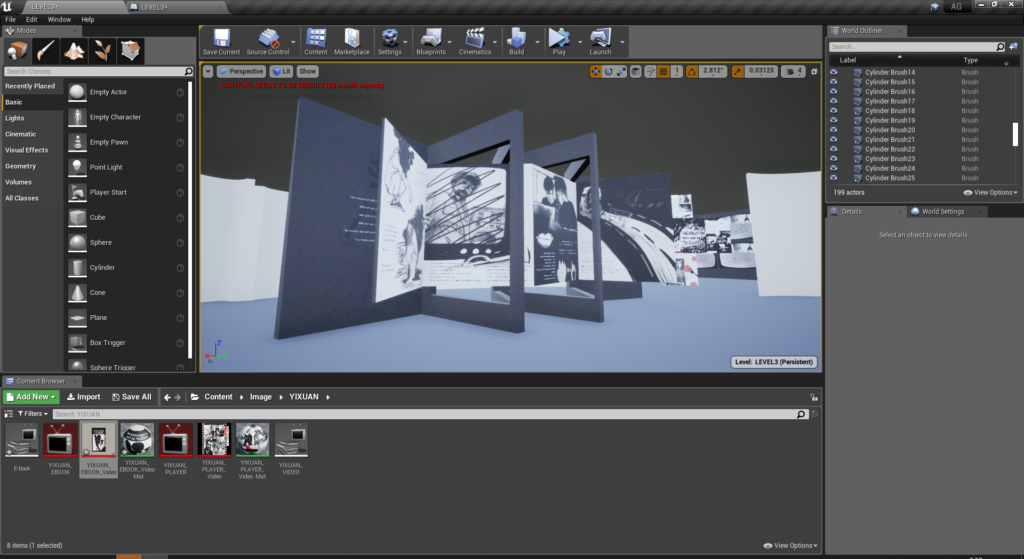
Here is an orthography I made based on Monica’s design, with the geometry functions in the engine:
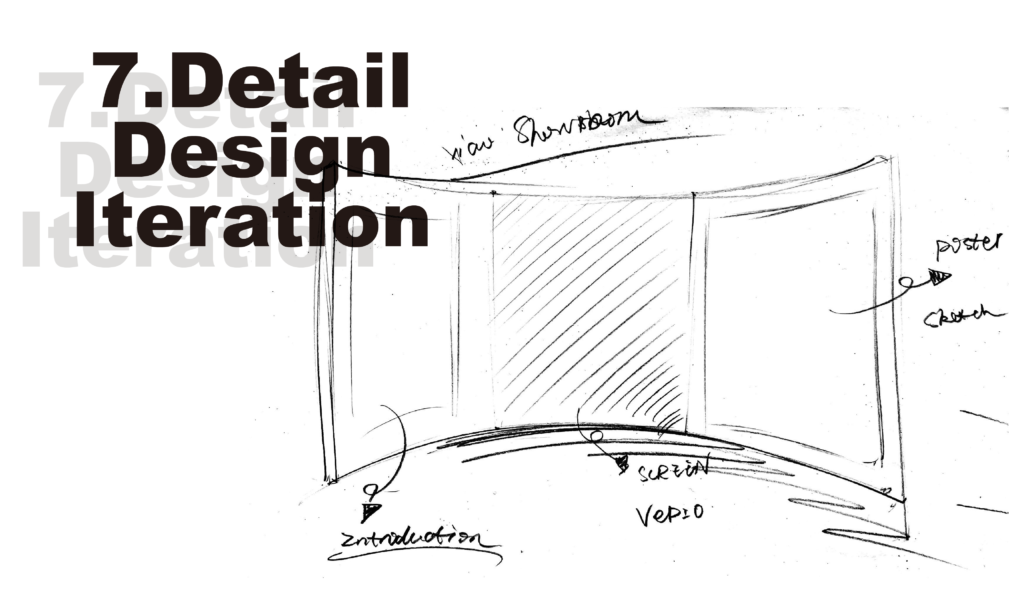
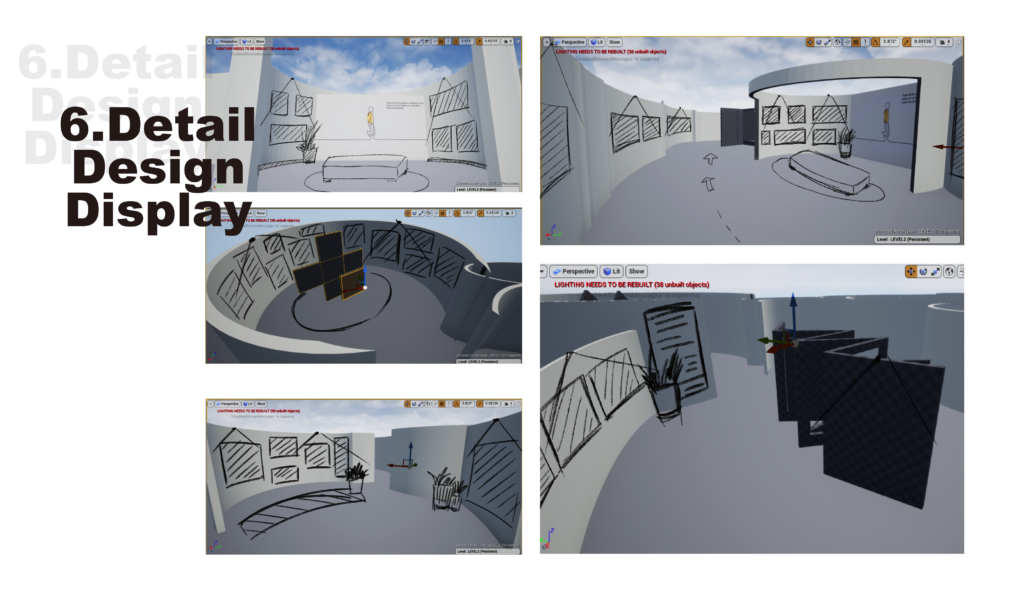
Monica also sent me a series of detailed designs/compositions for the exhibition, and I turned them into 3D space, see below:
Front door 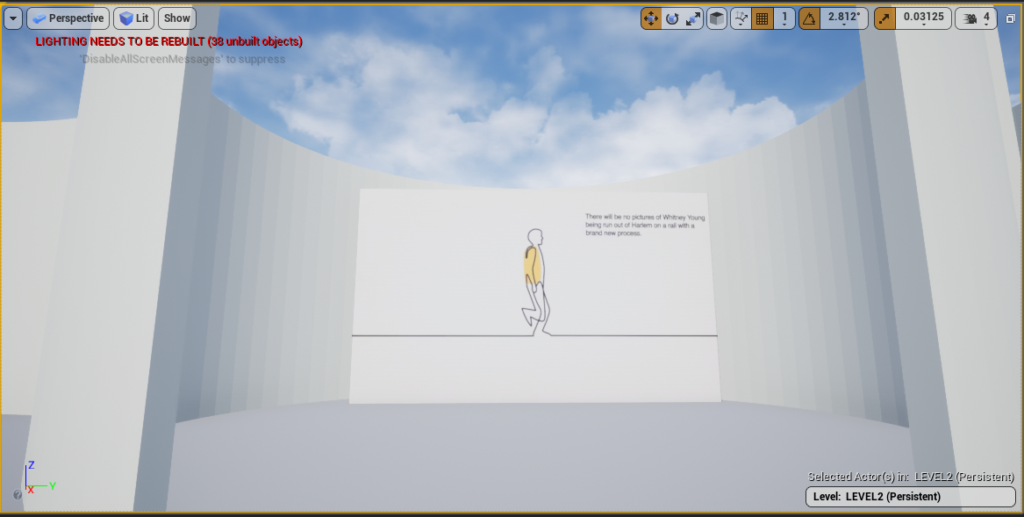
Yixuan’s space
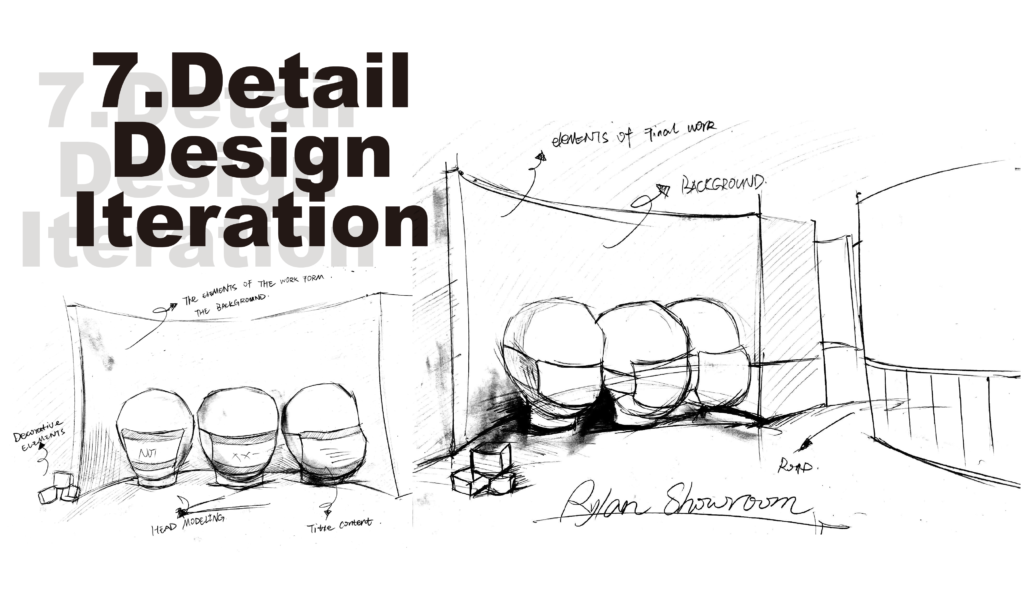
Rylan’s space 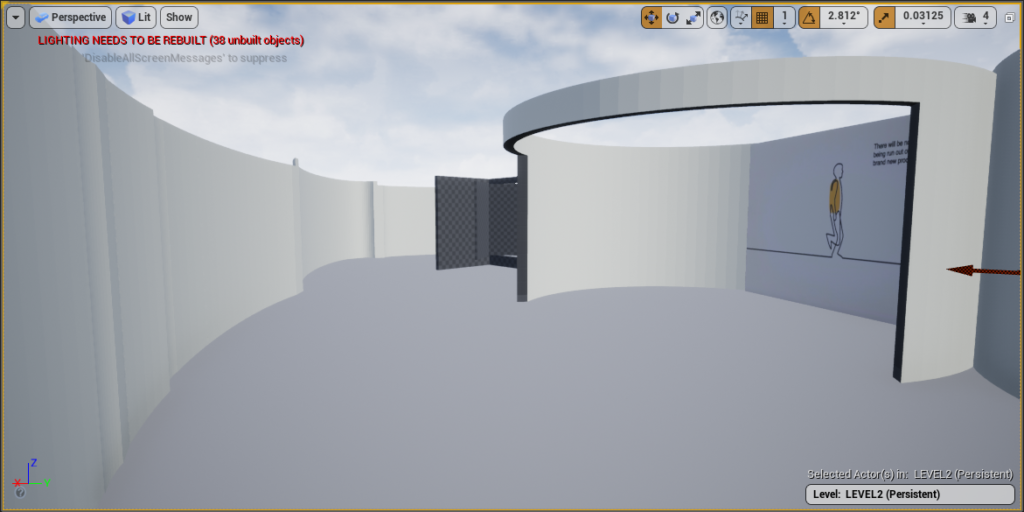
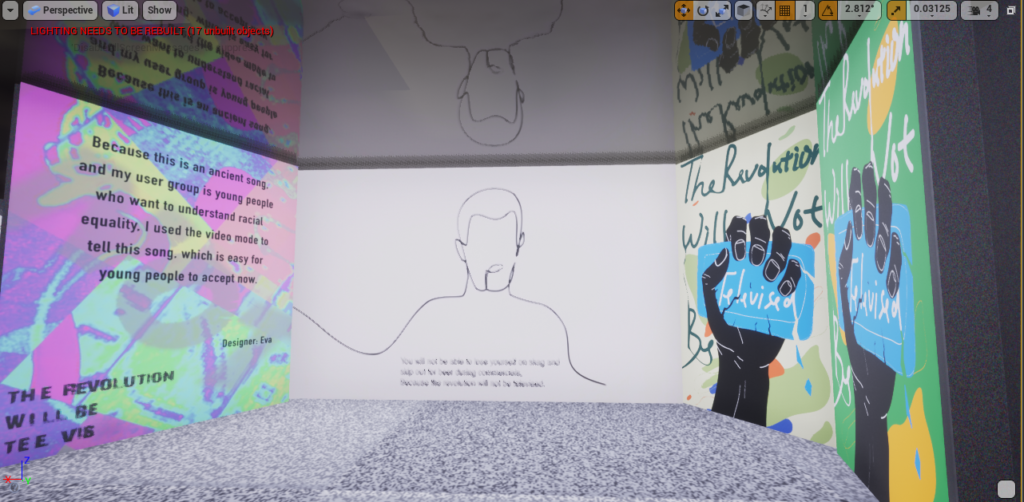
Eva’s space
For Monica’s space, we had a discussion on the display of her work. In the beginning, we wanted to turn her booklet into an interactive exhibit. However, we thought enlarging her work might have better visual impacts. Therefore, I made a larger scale of her work to place in the exhibition, see below:
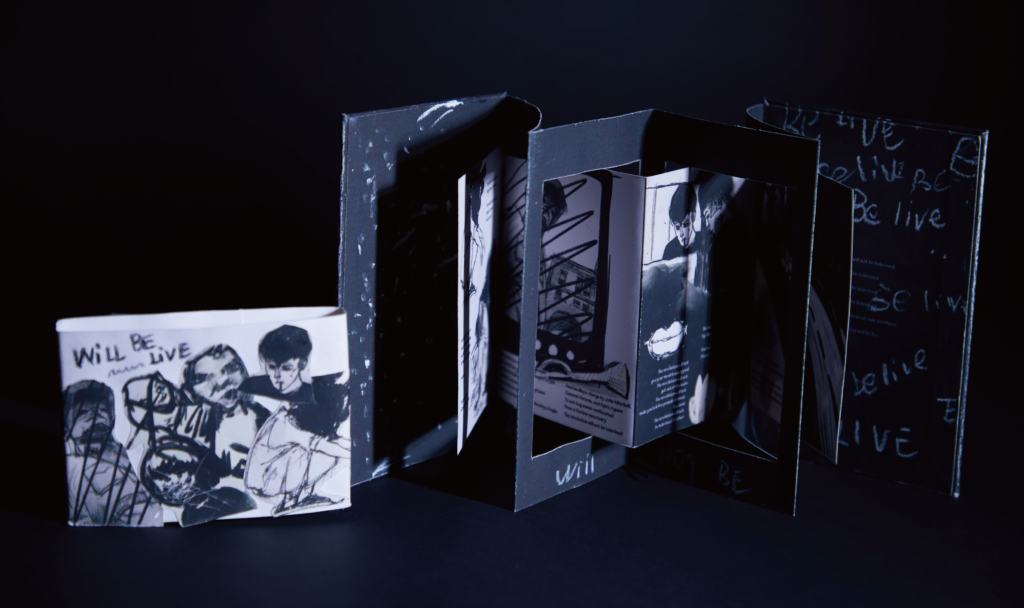
Monica’s space
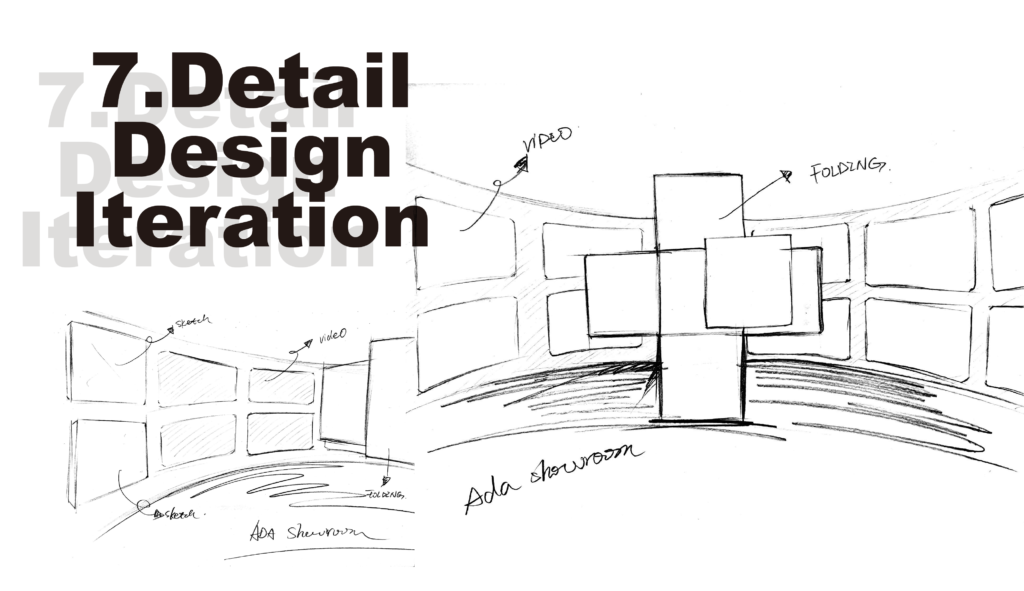
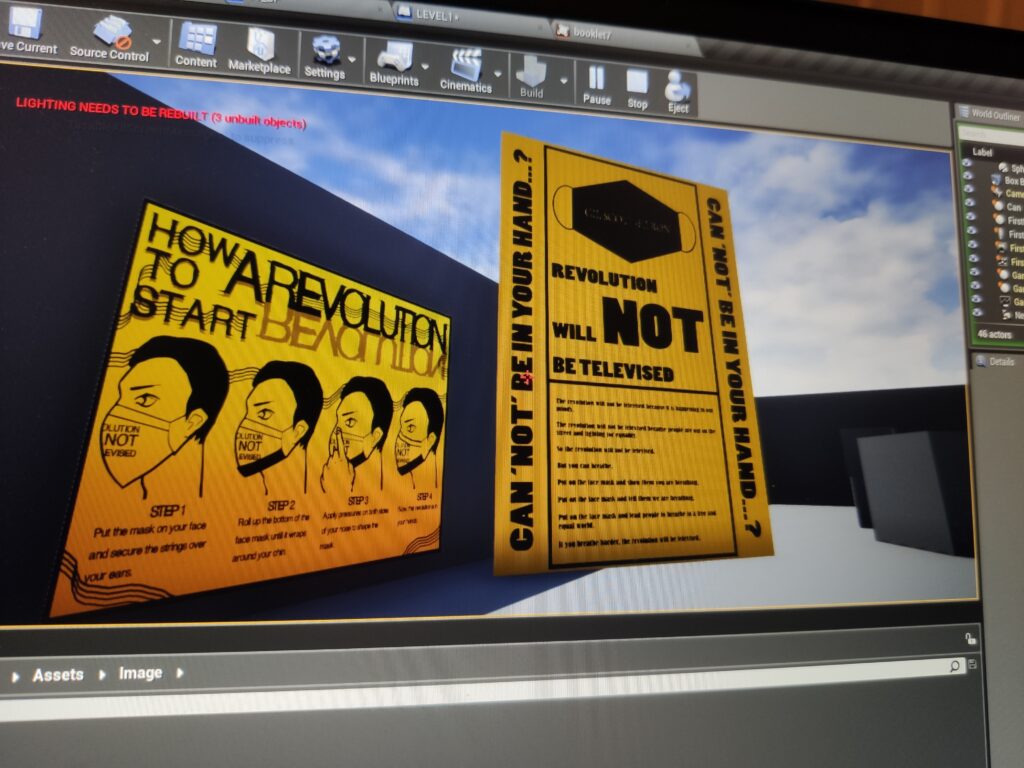
The same idea goes to Ada’s booklet:
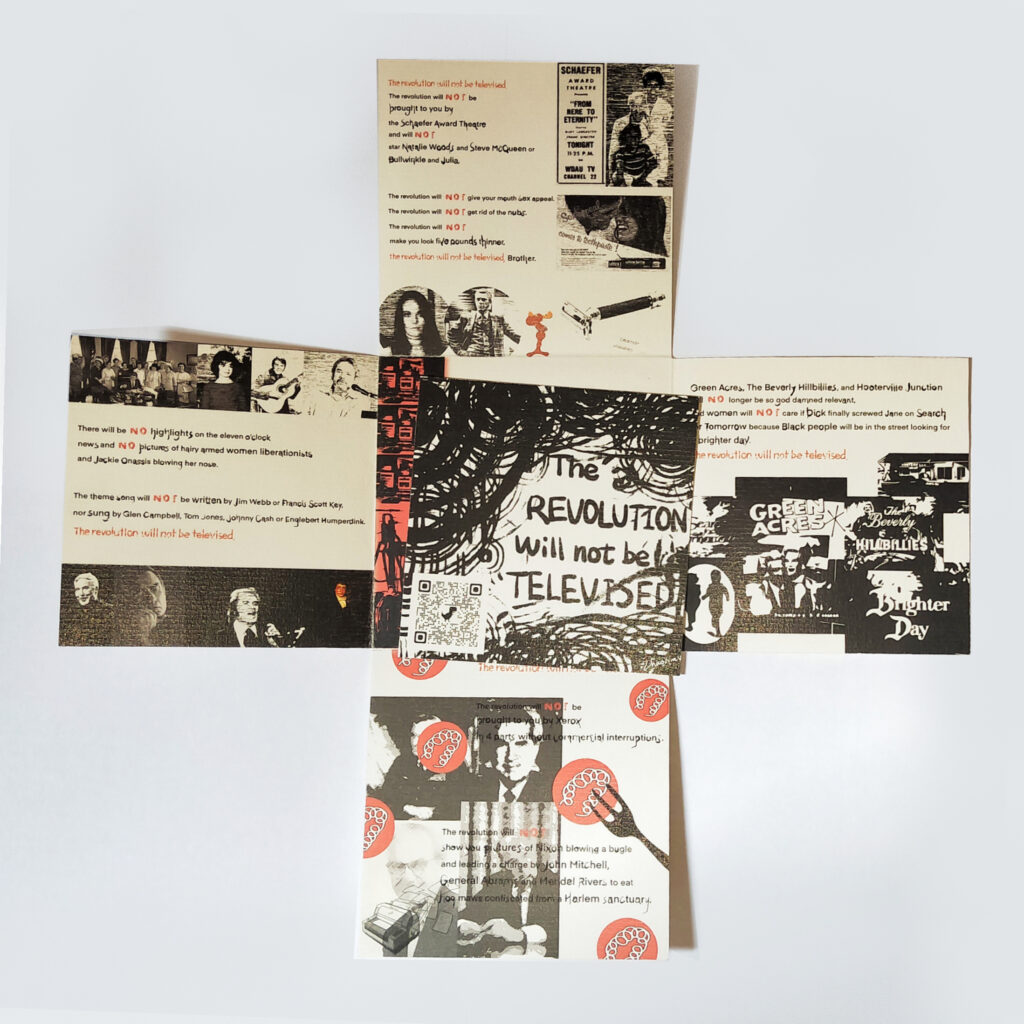
Ada’s space
MEETING 02: EXHIBITION ARRANGEMENT
Once the general layout is done, it is time to fill in the details.
We had our second meeting on the campus to sit down and discuss the arrangements for the exhibition. Monica designed a more detailed version of the exhibition layout on top of my screenshots:
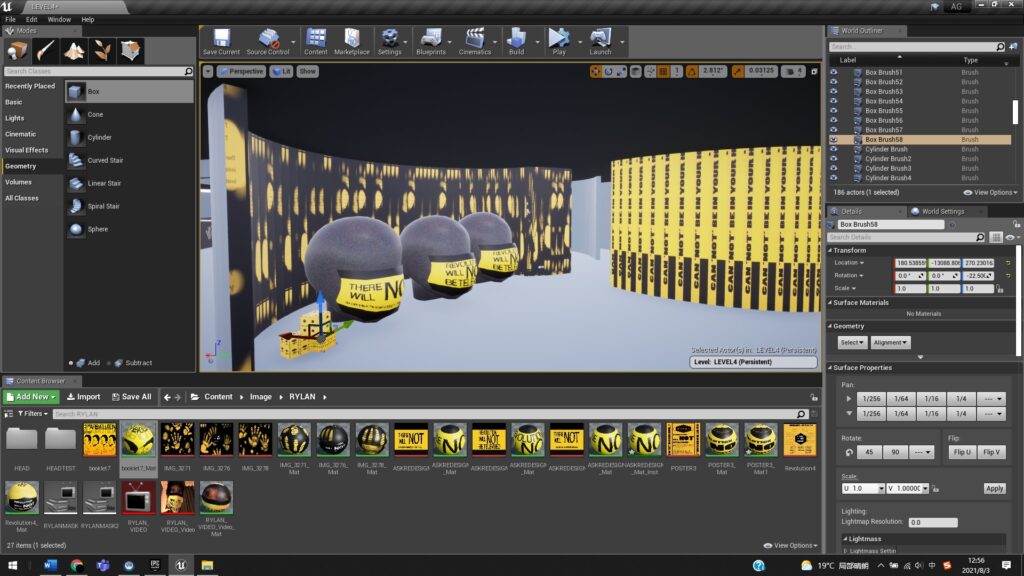
Meanwhile, I have successfully received everyone’s work and put them into the exhibition.
Here are the outcomes based on Monica’s design:
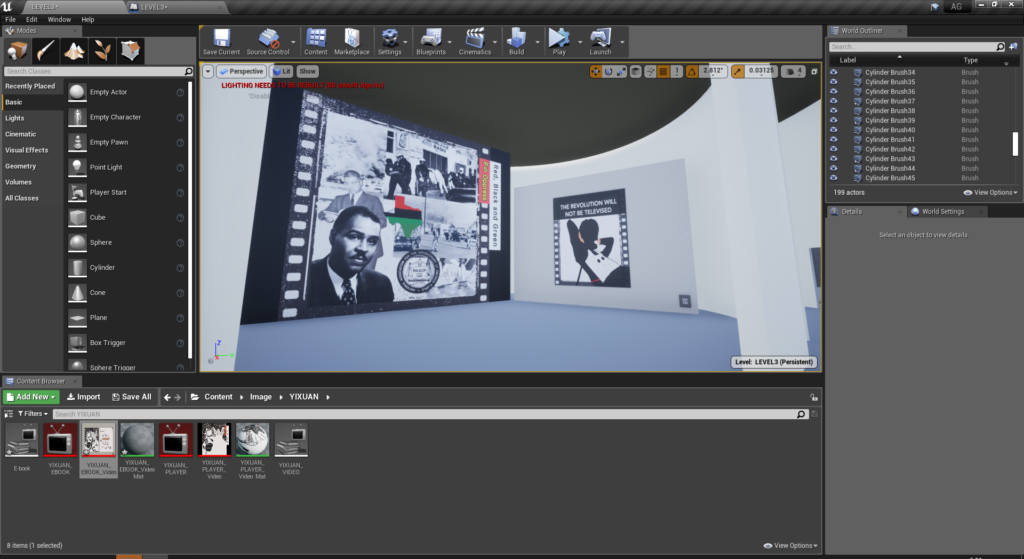
Before 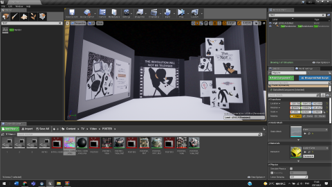
After
Before 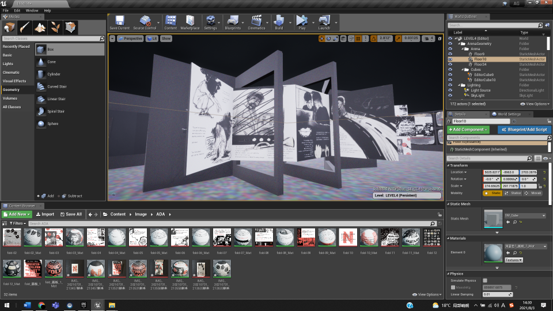
After
I have also 3D modelled a couple of heads in Blender to display my facemask project:
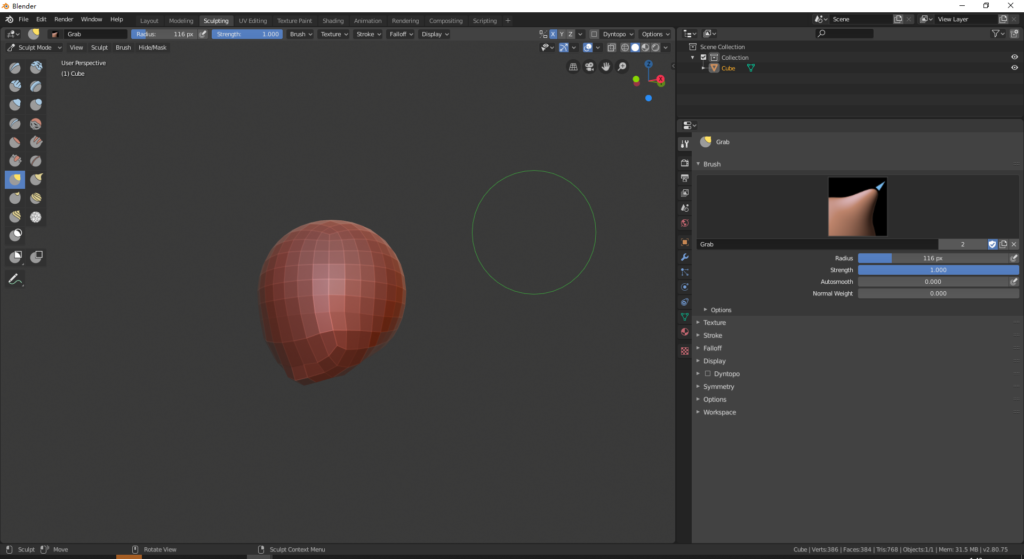
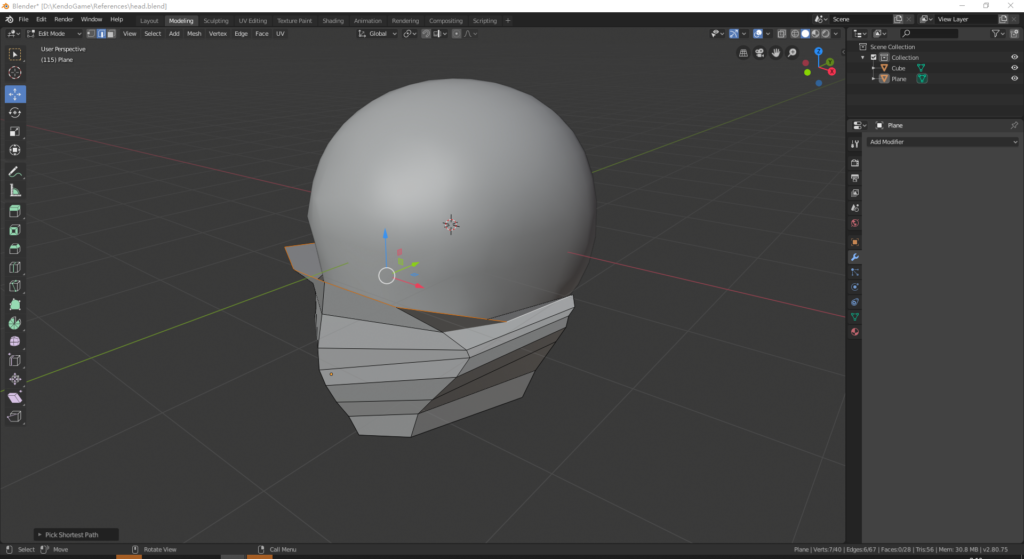
Before 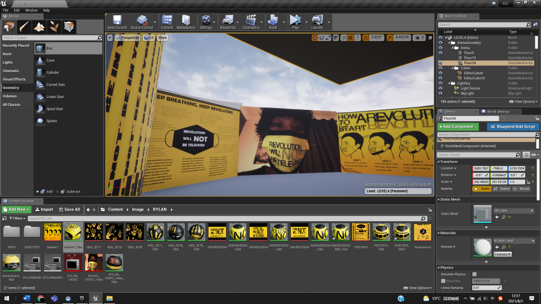
After
Ada also passes through a few textures for me to test out in the game, visit her website to view the process:
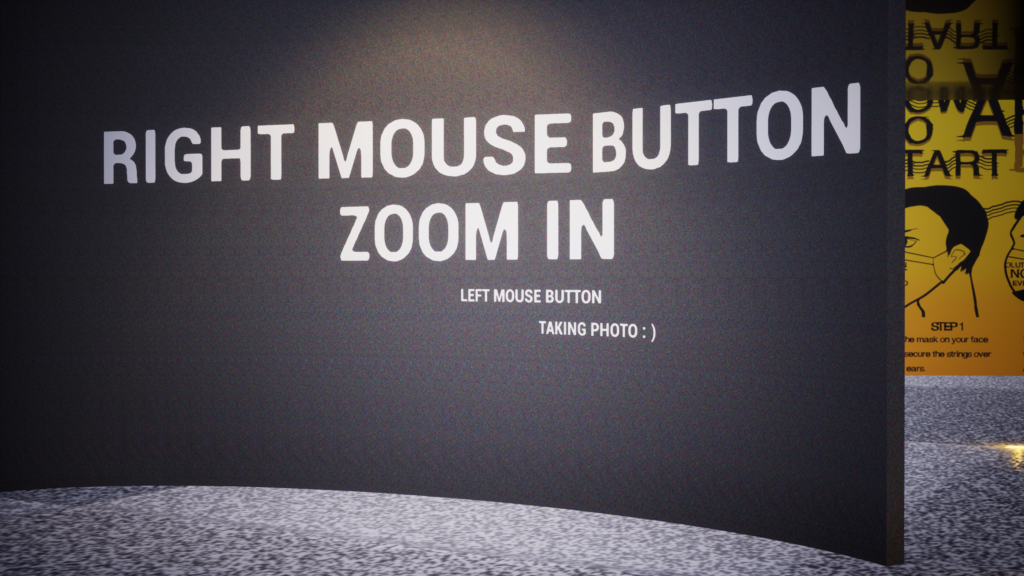
DAY 4: ZOOM IN & PHOTOGRAPHY
Zoom in & out function really helps the players to improve their experiences. For instance, Monica’s exhibit has texts appear in a higher place, and this is when the zoom in function works very well.
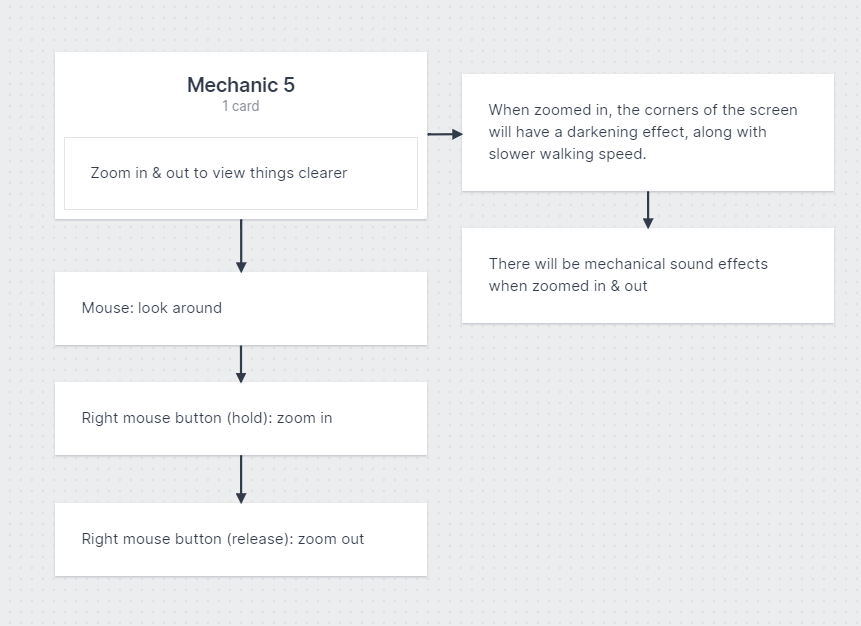
The video below is the outcome of the zoom-in function. I also added some sound effects to improve the experience:
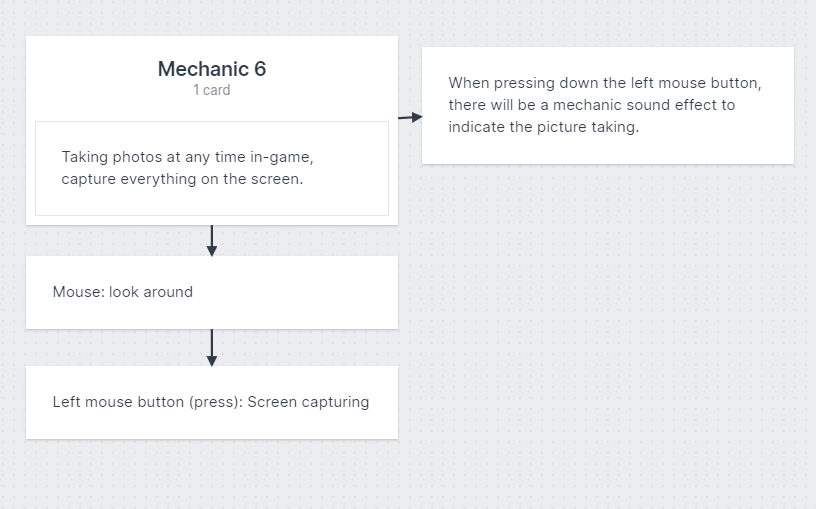
Everyone likes taking cool pictures during the exhibition. I think this should be a ‘must’ mechanic in our game. I learned how to do it from this tutorial here:
I learned how to operate this function, and adapted it onto the first-person view to create a ‘camera-like feeling, see video below:
MEETING 03: PRESENTATION
In our final meeting, we discussed the contents of the presentation, here is a downloadable link of our presentation:


The presentation was made by our marketing manager Yixuan and the creative director Eva, please see details on their website:
DAY 5https://eva.macd.work/project-3-amplify/: RUNNING & POLISHING
Throughout years of playing & making video games, one thing I am definitely adding is the running mechanic. This simple function allows players to control their own pace easily, and create a better gameplay experience:

See running mechanic below:
Once the mechanics are done, and all workers have been implemented into the game, the final step is to do some polishing. Here is the list:
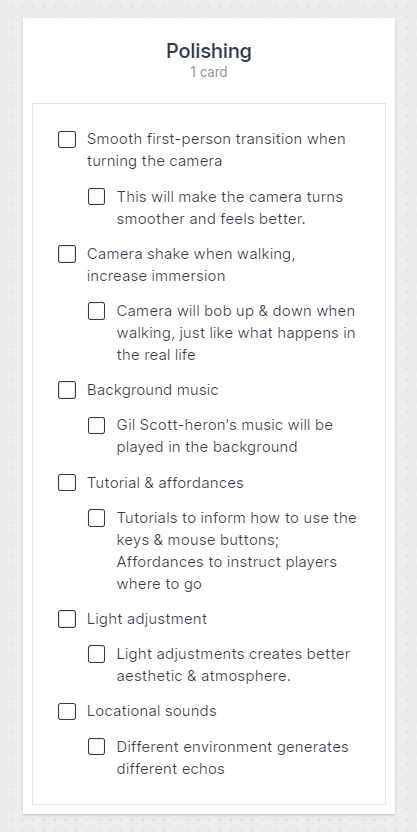
Firstly, I added some tutorial tips:
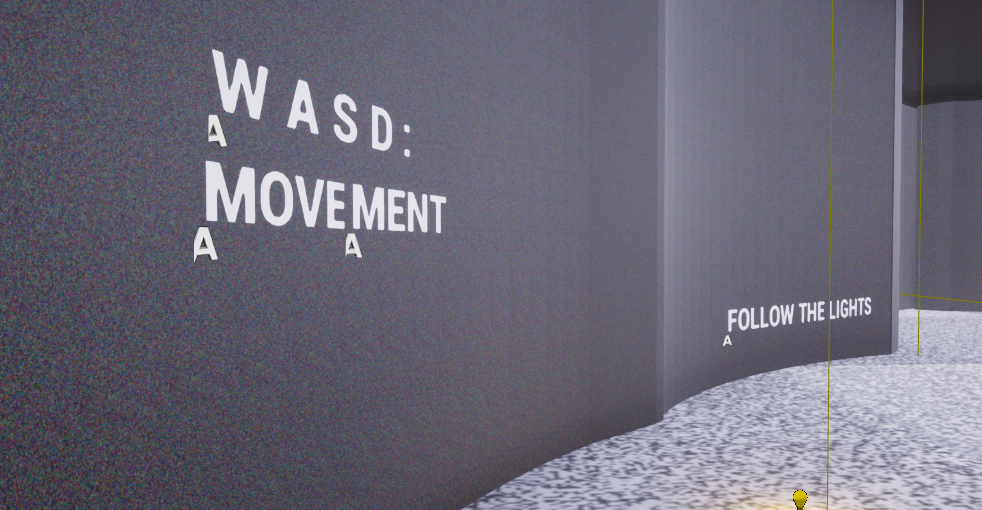
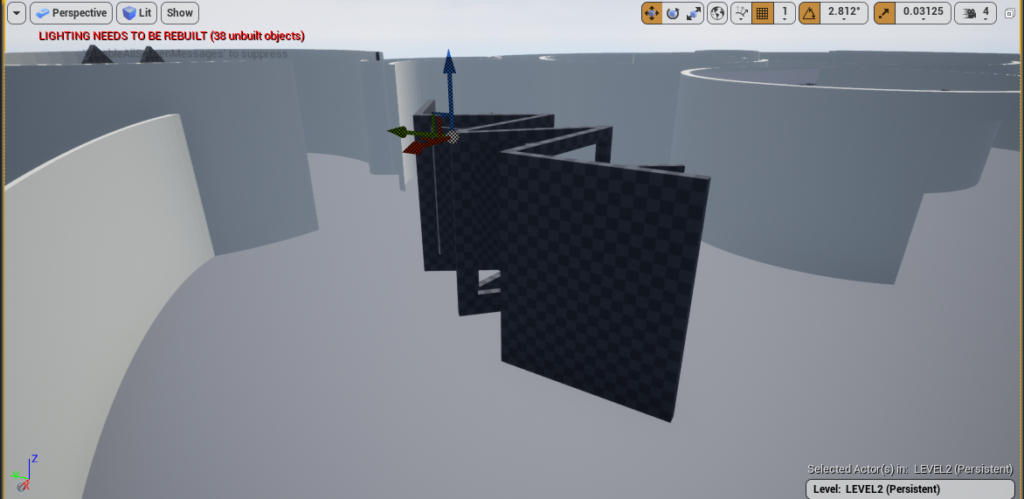
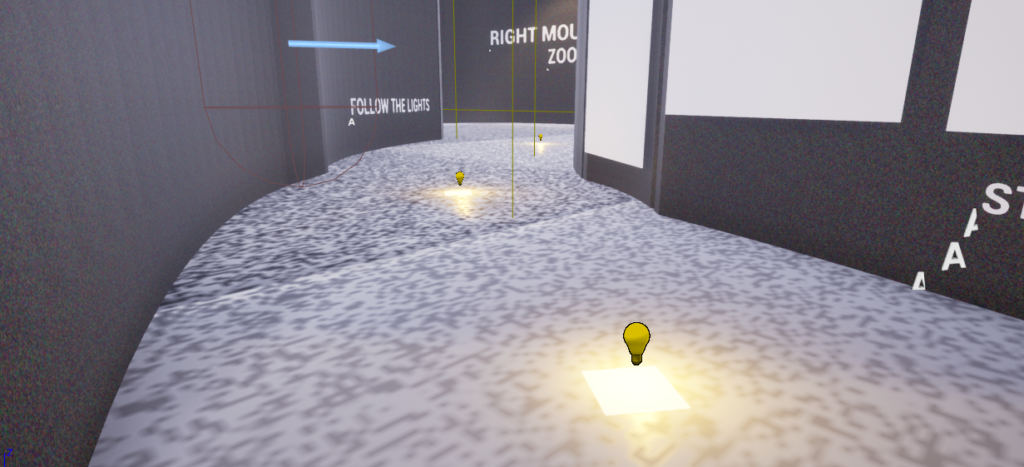
We also considered the affordances in the game. We thought that having some lights on the ground can guide the players to walk around the exhibition hall like the image showing below:
I have also done some lighting adjustments:

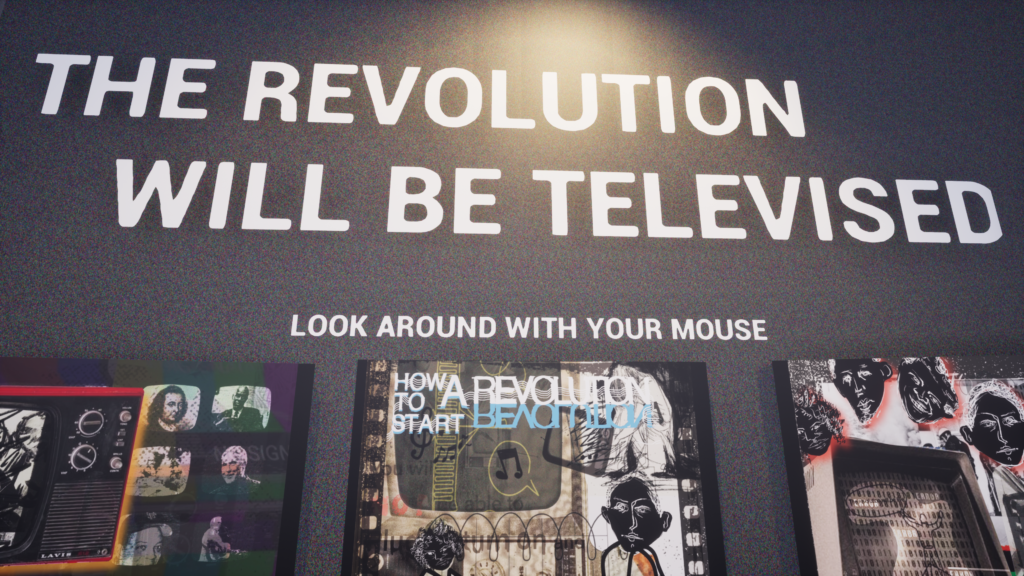
OUTCOME.
This is the outcome:
PROJECT 3 REFELECTION.
The opportunity of working in teams again helped me to retrieve the feeling of teamwork. I have been doing individual work for almost six months now, and it feels strange to be back.
During my previous teamwork experiences, I was always taking the role of a creative director or the lead designer, primarily focusing on the design aspects. However, I chose not to touch anything design-related because I want to try something new. In that case, I took the role of the code designer.
I am not a coder, and I have never done anything code-related work before. However, project 3 allowed me to step out of my comfort zone and code a game from start to finish. The only thing I could do was touching the surface of ‘blueprints’: a visual coding tool adapted to Unreal Engine 4, meaning that it is primarily used for game coding instead of other things.
As a programmer, I enjoyed working with my teammates because everyone was respectful and creative. Most importantly, all of my teammates know their job roles and have excellent communication during the development. For instance, Monica designed most of the layout, and the only thing I needed to do was follow her instructions, which is an effective way of working in teams. As a code designer, I am busy enough to compile everyone’s work and develop complex gameplay mechanics. Therefore, it makes my job harder to do if the instructions are unclear, and I have to re-design it. Luckily, our team has excellent communication, and I did not do anything extra.
The biggest challenge for me was to create an immersive experience for the audience. The immersions do not appear from walking or taking pictures in the exhibition; it is more about the minor details. I gained this insight after testing the mechanics again and again.
For instance, I added tiny head bobs when walking and running to create a more realistic control feel. I call this design theory the ‘mechanic expansion’. This means that I build a base mechanic and then add extra details to increase immersions. Another example is when zoomed in, the player’s speed decreases to stabilise the camera. These tiny details can hugely improve players’ experiences.
Some things did not work out during the developments. One example is the ‘inspection’ mechanic. As I mentioned before, I am not a good coder, and I encountered some bugs in the inspection mechanic that I could not fix. Unfortunately, we had to ditch this mechanic and changed all exhibits to non-interactable in the exhibition. Except for this issue, we also had images or videos that could not import into the exhibition, and it is a shame that we had to leave them in the end.
After the crit, both Danny and Andy suggested having something more interactive, such as a VR mode that allows players to walk around the exhibition physically.
In conclusion, I am pleased with the outcome because we only had two weeks to develop everything, and clearly, our team has done an excellent job to execute this project. Through this experience of teamwork and being a code designer, I understand that sometimes it is impossible to follow a designer’s instructions due to various issues. However, it will end up with other solutions and even better ones, and this process is called problem-solving.